Deskripsi
Autentikasi JSON Web Token untuk WordPress memungkinkan Anda melakukan autentikasi REST API melalui token. Ini sederhana, tidak rumit, dan mudah digunakan. Plugin ini mungkin adalah cara yang paling nyaman untuk melakukan Autentikasi JWT di WordPress.
- Dukungan & pertanyaan: Forum Support WordPress
- Melaporkan bug-nya plugin: GitHub issues tracker
- Discord channel juga tersedia untuk respon yang lebih cepat.
Upgrading to v3
When updating from v2 to v3, familiarise yourself with its changes to ensure that your site continues to work as expected:
New: Refresh tokens ([docs](https://github.com/usefulteam/jwt-auth#refreshing-the-access-token))
Key changes:
- Default JWT access token expiry time has been reduced from 7 days to 10 minutes.
- On expiry of a JWT, clients need to retrieve a new access token using the refresh token as described here.
- To retain the 7 day expiry time, use the hook
jwt_auth_expire.
Removed Whitelist
Key changes:
- You no longer need to whitelist REST paths from other plugins with the hook
jwt_auth_whitelist. You can remove the hook. - Instead, custom REST API routes should have access requirements specified with the permissions callback when it is registered.
- This means that if a route requires authentication, any authentication method can be used and this should reduce conflicts between this and other plugins. See this discussion for further information.
Enable PHP HTTP Authorization Header
Shared Hosts
Most shared hosts have disabled the HTTP Authorization Header by default.
To enable this option you’ll need to edit your .htaccess file by adding the following:
RewriteEngine on
RewriteCond %{HTTP:Authorization} ^(.*)
RewriteRule ^(.*) - [E=HTTP_AUTHORIZATION:%1]
WPEngine
To enable this option you’ll need to edit your .htaccess file by adding the following (see this issue):
SetEnvIf Authorization "(.*)" HTTP_AUTHORIZATION=$1
Configuration
Configurate the Secret Key
The JWT needs a secret key to sign the token. This secret key must be unique and never be revealed.
To add the secret key, edit your wp-config.php file and add a new constant called JWT_AUTH_SECRET_KEY.
define('JWT_AUTH_SECRET_KEY', 'your-top-secret-key');
You can use a string from here
Configurate CORs Support
This plugin has the option to activate CORs support.
To enable the CORs Support edit your wp-config.php file and add a new constant called JWT_AUTH_CORS_ENABLE
define('JWT_AUTH_CORS_ENABLE', true);
Namespace and Endpoints
When the plugin is activated, a new namespace is added.
/jwt-auth/v1
Also, three new POST endpoints are added to this namespace.
/wp-json/jwt-auth/v1/token
/wp-json/jwt-auth/v1/token/validate
/wp-json/jwt-auth/v1/token/refresh
Requesting/ Generating Token
/wp-json/jwt-auth/v1/token
To generate token, submit a POST request to this endpoint. With username and password as the parameters.
It will validates the user credentials, and returns success response including a token if the authentication is correct or returns an error response if the authentication is failed.
You can use the optional parameter device with the device identifier to let user manage the device access in your profile. If this parameter is empty, it is ignored.
Sample of success response when trying to generate token:
{
    "success": true,
    "statusCode": 200,
    "code": "jwt_auth_valid_credential",
    "message": "Credential is valid",
    "data": {
        "token": "eyJ0eXAiOiJKV1QiLCJhbGciOiJIUzI1NiJ9.eyJpc3MiOiJodHRwczpcL1wvcG9pbnRzLmNvdXZlZS5jby5pZCIsImlhdCI6MTU4ODQ5OTE0OSwibmJmIjoxNTg4NDk5MTQ5LCJleHAiOjE1ODkxMDM5NDksImRhdGEiOnsidXNlciI6eyJpZCI6MX19fQ.w3pf5PslhviHohmiGF-JlPZV00XWE9c2MfvBK7Su9Fw",
        "id": 1,
        "email": "contactjavas@gmail.com",
        "nicename": "contactjavas",
        "firstName": "Bagus Javas",
        "lastName": "Heruyanto",
        "displayName": "contactjavas"
    }
}
Sample of error response when trying to generate token:
{
    "success": false,
    "statusCode": 403,
    "code": "invalid_username",
    "message": "Unknown username. Try again or check your email address.",
    "data": []
}
Once you get the token, you must store it somewhere in your application. It can be:
– using cookie
– or using localstorage
– or using a wrapper like localForage or PouchDB
– or using local database like SQLite or Hive
– or your choice based on app you develop 😉
Then you should pass this token as Bearer Authentication header to every API call. The header format is:
Authorization: Bearer your-generated-token
dan berikut adalah sebuah contoh:
"Authorization: Bearer eyJ0eXAiOiJKV1QiLCJhbGciOiJIUzI1NiJ9.eyJpc3MiOiJodHRwczpcL1wvcG9pbnRzLmNvdXZlZS5jby5pZCIsImlhdCI6MTU4ODQ5OTE0OSwibmJmIjoxNTg4NDk5MTQ5LCJleHAiOjE1ODkxMDM5NDksImRhdGEiOnsidXNlciI6eyJpZCI6MX19fQ.w3pf5PslhviHohmiGF-JlPZV00XWE9c2MfvBK7Su9Fw";
The jwt-auth will intercept every call to the server and will look for the authorization header, if the authorization header is present, it will try to decode the token and will set the user according with the data stored in it.
If the token is valid, the API call flow will continue as always.
Validating Token
Anda kemungkinan tidak perlu untuk memvalidasi token Anda sendiri. Plugin ini menanganinya untuk Anda seperti dijelaskan di atas.
Tetapi jika Anda ingin menguji atau memvalidasi token secara manual, maka kirimkan permintaan POST ke endpoint ini (jangan lupa mengatur header Bearer Authorization Anda):
/wp-json/jwt-auth/v1/token/validate
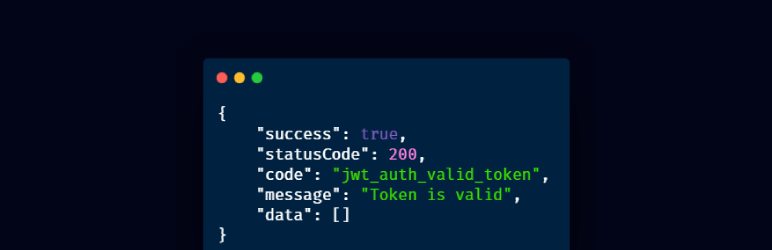
Valid Token Response:
{
    "success": true,
    "statusCode": 200,
    "code": "jwt_auth_valid_token",
    "message": "Token is valid",
    "data": []
}
Refreshing the Access Token
For security reasons, third-party applications that are integrating with your authentication server will not store the user’s username and password. Instead they will store the refresh token in a user-specific storage that is only accessible for the user. The refresh token can be used to re-authenticate as the same user and generate a new access token.
When authenticating with username and password as the parameters to /wp-json/jwt-auth/v1/token, a refresh token is sent as a cookie in the response.
/wp-json/jwt-auth/v1/token
To generate new access token using the refresh token, submit a POST request to the token endpoint together with the refresh_token cookie.
Use the optional parameter device with the device identifier to associate the token with that device.
If the refresh token is valid, then you receive a new access token in the response.
By default, each access token expires after 10 minutes.
/wp-json/jwt-auth/v1/token/refresh
To generate new refresh token using the refresh token, submit a POST request to the token refresh endpoint together with the refresh_token cookie.
Use the optional parameter device with the device identifier to associate the refresh token with that device.
If the refresh token is valid, then you receive a new refresh token as a cookie in the response.
By default, each refresh token expires after 30 days.
Refresh Token Rotation
Whenever you are authenticating afresh or refreshing the refresh token, only the last issued refresh token remains valid. All previously issued refresh tokens can no longer be used.
This means that a refresh token cannot be shared. To allow multiple devices to authenticate in parallel without losing access after another device re-authenticated, use the parameter device with the device identifier to associate the refresh token only with that device.
curl -F device="abc-def" -F username=myuser -F password=mypass /wp-json/jwt-auth/v1/token


curl -F device="abc-def" -b "refresh_token=123.abcdef..." /wp-json/jwt-auth/v1/token


curl -F device="abc-def" -b "refresh_token=123.abcdef..." /wp-json/jwt-auth/v1/token/refresh
Errors
If the token is invalid an error will be returned. Here are some samples of errors:
No Secret Key
{
    "success": false,
    "statusCode": 403,
    "code": "jwt_auth_bad_config",
    "message": "JWT is not configured properly.",
    "data": []
}
No HTTP_AUTHORIZATION Header
{
    "success": false,
    "statusCode": 403,
    "code": "jwt_auth_no_auth_header",
    "message": "Authorization header not found.",
    "data": []
}
Bad Iss
{
    "success": false,
    "statusCode": 403,
    "code": "jwt_auth_bad_iss",
    "message": "The iss do not match with this server.",
    "data": []
}
Invalid Signature
{
    "success": false,
    "statusCode": 403,
    "code": "jwt_auth_invalid_token",
    "message": "Signature verification failed",
    "data": []
}
Incomplete Payload
{
    "success": false,
    "statusCode": 403,
    "code": "jwt_auth_bad_request",
    "message": "User ID not found in the token.",
    "data": []
}
Pengguna Tidak Ditemukan
{
    "success": false,
    "statusCode": 403,
    "code": "jwt_auth_user_not_found",
    "message": "User doesn't exist",
    "data": []
}
Expired Token
{
    "success": false,
    "statusCode": 403,
    "code": "jwt_auth_invalid_token",
    "message": "Expired token",
    "data": []
}
Obsolete Token
{
    "success": false,
    "statusCode": 403,
    "code": "jwt_auth_obsolete_token",
    "message": "Token is obsolete",
    "data": []
}
Invalid Refresh Token
{
    "success": false,
    "statusCode": 401,
    "code": "jwt_auth_invalid_refresh_token",
    "message": "Invalid refresh token",
    "data": []
}
Obsolete Refresh Token
{
    "success": false,
    "statusCode": 401,
    "code": "jwt_auth_obsolete_refresh_token",
    "message": "Refresh token is obsolete",
    "data": []
}
Expired Refresh Token
{
    "success": false,
    "statusCode": 401,
    "code": "jwt_auth_expired_refresh_token",
    "message": "Refresh token has expired",
    "data": []
}
Hook- hook Filter yang Tersedia
JWT Auth is developer friendly and has some filters available to override the default settings.
jwt_auth_cors_allow_headers
The jwt_auth_cors_allow_headers allows you to modify the available headers when the CORs support is enabled.
Default Value:
'X-Requested-With, Content-Type, Accept, Origin, Authorization'
Contoh penggunaan:
/**
 * Change the allowed CORS headers.
 *
 * @param string $headers The allowed headers.
 * @return string The allowed headers.
 */
add_filter(
    'jwt_auth_cors_allow_headers',
    function ( $headers ) {
        // Modify the headers here.
        return $headers;
    }
);
jwt_auth_iss
jwt_auth_iss memungkinkan Anda untuk mengubah nilai iss sebelum payload dikodekan menjadi token.
Default Value:
get_bloginfo( 'url' )
Contoh penggunaan:
/**
 * Change the token issuer.
 *
 * @param string $iss The token issuer.
 * @return string The token issuer.
 */
add_filter(
    'jwt_auth_iss',
    function ( $iss ) {
        // Modify the "iss" here.
        return $iss;
    }
);
jwt_auth_not_before
The jwt_auth_not_before allows you to change the nbf value before the payload is encoded to be a token.
Default Value:
// Creation time.
time()
Contoh penggunaan:
/**
 * Change the token's nbf value.
 *
 * @param int $not_before The default "nbf" value in timestamp.
 * @param int $issued_at The "iat" value in timestamp.
 *
 * @return int The "nbf" value.
 */
add_filter(
    'jwt_auth_not_before',
    function ( $not_before, $issued_at ) {
        // Modify the "not_before" here.
        return $not_before;
    },
    10,
    2
);
jwt_auth_expire
The jwt_auth_expire allows you to change the value exp before the payload is encoded to be a token.
Default Value:
time() + (DAY_IN_SECONDS * 7)
Contoh penggunaan:
/**
 * Change the token's expire value.
 *
 * @param int $expire The default "exp" value in timestamp.
 * @param int $issued_at The "iat" value in timestamp.
 *
 * @return int The "nbf" value.
 */
add_filter(
    'jwt_auth_expire',
    function ( $expire, $issued_at ) {
        // Modify the "expire" here.
        return $expire;
    },
    10,
    2
);
jwt_auth_refresh_expire
The jwt_auth_refresh_expire filter hook allows you to change the expiration date of the refresh token.
Default Value:
time() + (DAY_IN_SECONDS * 30)
Contoh penggunaan:
/**
 * Change the refresh token's expiration time.
 *
 * @param int $expire The default expiration timestamp.
 * @param int $issued_at The current time.
 *
 * @return int The custom refresh token expiration timestamp.
 */
add_filter(
    'jwt_auth_refresh_expire',
    function ( $expire, $issued_at ) {
        // Modify the "expire" here.
        return $expire;
    },
    10,
    2
);
jwt_auth_alg
Filter jwt_auth_alg memungkinkan Anda untuk mengubah algoritma penandaan yang didukung untuk aplikasi Anda.
Default Value:
'HS256'
Contoh penggunaan:
/**
 * Change the token's signing algorithm.
 *
 * @param string $alg The default supported signing algorithm.
 * @return string The supported signing algorithm.
 */
add_filter(
    'jwt_auth_alg',
    function ( $alg ) {
        // Change the signing algorithm here.
        return $alg;
    }
);
jwt_auth_payload
The jwt_auth_payload allows you to modify all the payload / token data before being encoded and signed.
Default value:
<?php
$token = array(
    'iss' => get_bloginfo('url'),
    'iat' => $issued_at,
    'nbf' => $not_before,
    'exp' => $expire,
    'data' => array(
        'user' => array(
            'id' => $user->ID,
        )
    )
);
Contoh penggunaan:
/**
 * Modify the payload/ token's data before being encoded & signed.
 *
 * @param array $payload The default payload
 * @param WP_User $user The authenticated user.
 * .
 * @return array The payload/ token's data.
 */
add_filter(
    'jwt_auth_payload',
    function ( $payload, $user ) {
        // Modify the payload here.
        return $payload;
    },
    10,
    2
);
jwt_auth_valid_credential_response
Filter jwt_auth_valid_credential_response memungkinkan Anda untuk memodifikasi tanggapan kredensial yang valid saat membuat token.
Default value:
<?php
$response = array(
    'success'    => true,
    'statusCode' => 200,
    'code'       => 'jwt_auth_valid_credential',
    'message'    => __( 'Credential is valid', 'jwt-auth' ),
    'data'       => array(
        'token'       => $token,
        'id'          => $user->ID,
        'email'       => $user->user_email,
        'nicename'    => $user->user_nicename,
        'firstName'   => $user->first_name,
        'lastName'    => $user->last_name,
        'displayName' => $user->display_name,
    ),
);
Contoh penggunaan:
/**
 * Modify the response of valid credential.
 *
 * @param array $response The default valid credential response.
 * @param WP_User $user The authenticated user.
 * .
 * @return array The valid credential response.
 */
add_filter(
    'jwt_auth_valid_credential_response',
    function ( $response, $user ) {
        // Modify the response here.
        return $response;
    },
    10,
    2
);
jwt_auth_valid_token_response
Filter jwt_auth_valid_token_response memungkinkan Anda untuk memodifikasi tanggapan token yang valid saat memvalidasi token.
Default value:
<?php
$response = array(
    'success'    => true,
    'statusCode' => 200,
    'code'       => 'jwt_auth_valid_token',
    'message'    => __( 'Token is valid', 'jwt-auth' ),
    'data'       => array(),
);
Contoh penggunaan:
/**
 * Modify the response of valid token.
 *
 * @param array $response The default valid token response.
 * @param WP_User $user The authenticated user.
 * @param string $token The raw token.
 * @param array $payload The token data.
 * .
 * @return array The valid token response.
 */
add_filter(
    'jwt_auth_valid_token_response',
    function ( $response, $user, $token, $payload ) {
        // Modify the response here.
        return $response;
    },
    10,
    4
);
jwt_auth_extra_token_check
The jwt_auth_extra_token_check allows you to add extra criterias to validate the token. If empty, has no problem to proceed. Use empty value to bypass the filter. Any other value will block the token access and returns response with code jwt_auth_obsolete_token.
Default value:
''
Contoh penggunaan:
/**
 * Modify the validation of token. No-empty values block token validation.
 *
 * @param array $response An empty value ''.
 * @param WP_User $user The authenticated user.
 * @param string $token The raw token.
 * @param array $payload The token data.
 * .
 * @return array The valid token response.
 */
add_filter(
    'jwt_auth_extra_token_check',
    function ( $response, $user, $token, $payload ) {
        // Modify the response here.
        return $response;
    },
    10,
    4
);
Credits
PHP-JWT from firebase
JWT Authentication for WP REST API
Devices utility by pesseba
The awesome maintainers and contributors
Instalasi
Enable PHP HTTP Authorization Header
Shared Hosts
Most shared hosts have disabled the HTTP Authorization Header by default.
To enable this option you’ll need to edit your .htaccess file by adding the following:
RewriteEngine on
RewriteCond %{HTTP:Authorization} ^(.*)
RewriteRule ^(.*) - [E=HTTP_AUTHORIZATION:%1]
WPEngine
To enable this option you’ll need to edit your .htaccess file by adding the following (see this issue):
SetEnvIf Authorization "(.*)" HTTP_AUTHORIZATION=$1
Installing Through the WordPress Administrative Area:
- From WordPress administrative area, go to Plugins -> Add New
- Search for JWT Auth
- Install it
- Easily configure it (see “Configuration” below)
- and then activate it
Installing by Downloading Manually:
- Download the plugin from WordPress plugins page
- Upload to your wp-content directory
- Easily configure it (see “Configuration” below)
- Activate it from Plugins menu in admin area
Configuration
Configurate the Secret Key
The JWT needs a secret key to sign the token. It must be unique and never be revealed.
To add the secret key, edit your wp-config.php file and add a new constant called JWT_AUTH_SECRET_KEY.
define('JWT_AUTH_SECRET_KEY', 'your-top-secret-key');
You can use a string from here
Configurate CORs Support
This plugin has the option to enable CORs support.
To enable the CORs Support edit your wp-config.php file and add a new constant called JWT_AUTH_CORS_ENABLE
define('JWT_AUTH_CORS_ENABLE', true);
Finally activate the plugin within the plugin dashboard.
Tanya Jawab
Ulasan
Kontributor & Pengembang
“JWT Auth – Autentikasi JSON Web Token Untuk WordPress” adalah perangkat lunak open source. Berikut ini mereka yang sudah berkontribusi pada plugin ini.
Kontributor“JWT Auth – Autentikasi JSON Web Token Untuk WordPress” telah diterjemahkan dalam 5 bahasa. Terima kasih kepada para penerjemah untuk kontribusi-nya.
Terjemahkan “JWT Auth – Autentikasi JSON Web Token Untuk WordPress” dalam bahasa Anda.
Tertarik mengembangkan?
Lihat kode, periksa repositori SVN , atau mendaftar ke log pengembangan melalui RSS.
Log Perubahan
3.0.2
- Fix: Do not revalidate authentication headers if a valid user was determined already. (#75)
- Fix: Added debugging timeframe before purging refresh tokens. (#93)
- Fix: Fixed unnecessary user account lookup for device listing on user profile page. (#84)
- Fix: Added more granular refresh token validation error messages. (#78)
- Fix: Added integration for new CORS filter hook rest_allowed_cors_headers in WordPress 5.5.0. (#97)
- Fix: Updated Guzzle to v7.8.1 (used in tests only). (#112)
3.0.1
- Updated firebase/php-jwt to 6.3 to address security issue in versions prior to 6.x.
3.0.0
- New feature: Added support for refresh tokens.
- New feature: Added automated end-to-end tests using PHPUnit.
- Breaking change: Reduced default access token lifetime to 10 minutes.
- Breaking bugfix: All authentication error responses are using the correct HTTP status code 401 (Unauthorized) instead of 403 (Forbidden) now.
- Breaking change: Removed whitelist. To retain similar functionality, install a separate plugin, such as https://wordpress.org/plugins/disable-rest-api-and-require-jwt-oauth-authentication/
2.1.6
- Added automated asset updates from GitHub.
2.1.5
- Removed dev and build files from distribution.
2.1.4
- Added update warning and information relevant to updating to version 3.
2.1.3
- Fix some missing composer files in 2.1.2.
2.1.2
- Updated to fix a number of issues highlighted by wpcs.
2.1.1
- Updated firebase/php-jwt to 6.3 to address security issue in versions prior to 6.x.
2.1.0
- It’s possible now to whitelist an endpoint with specific method (GET/POST). See PR #47
2.0.0
- Breaking change: rename
jwt_auth_valid_token_extrafilter tojwt_auth_extra_token_check. Please check if you use this filter. - Breaking bugfix: the actual http statusCode didn’t follow the response statusCode. Now the actual http statusCode follows the response statusCode.
- New feature: connected device. Thanks @pesseba.
- Might be a breaking change: Add WordPress & WC default endpoints to
jwt_auth_default_whitelistto prevent error when visiting WordPress admin area. - Documentation: prevent misleading example by updating the
jwt_auth_whitelistusage.
1.4.2
- Bugfix: add
permission_callbackargument since it’s required in WP 5.5
1.4.1
- Bugfix: the previous
/wp-json/wp/v2/*whitelisting didn’t work. It should be/wp-json/wp/v2/(without the star char).
1.4.0
- Whitelist
/wp-json/wp/v2/*by default. This will prevent the plugin from breaking the default WordPress administration (gutenberg, etc). - Bugfix: fix the problem with WordPress subdir installation. See issue.
1.3.0
- Filter Change:
jwt_auth_valid_token_responseshould only filter the $response array instead of the wholeWP_REST_Response. Please check if you use this filter 🙂 - README update about
jwt_auth_whitelistfilter usage. That filter should be added directly (without hook) OR insideplugins_loaded. Adding it toinit(or after that) will not work.
1.2.0
- Critical Bugfix: WooCommerce admin breaks. With this change, WooCommerce admin should be good.
- New Filter: We whitelist some endpoints by default to support common plugin like WooCommerce. These default whitelisted endpoints are change-able via
jwt_auth_default_whitelistfilter.
1.1.0
- Support WooCommerce by ignoring
/wp-json/wc/and/wp-json/wc-auth/namespace. You can usejwt_auth_whitelistfilter if you want to whiteist other endpoints. See Whitelisting Endpoints section in the description tab.
1.0.0
- Filter Change: Rename
jwt_auth_token_payloadfilter tojwt_auth_payload - Filter Change: Rename
jwt_auth_token_responsefilter tojwt_auth_valid_credential_response - Critical Bugfix: The auth only restricted wp-json/jwt-auth/v1/* endpoints. So endpoints under other namespace were not restricted. With this change, other endpoints are restricted now. If you need to whitelist some endpoints, please read about Whitelisting Endpoints section in the description tab.
- New Filter:
jwt_auth_valid_token_response - New Filter: Make possible to whitelist specific endpoints via
jwt_auth_whitelistfilter. - New Filter: Make possible to change the token issuer by providing
jwt_auth_issfilter. - New Filter: Make possible to change the supported algorithm by providing
jwt_auth_algfilter. - New Filter: Make possible to change the valid token response by providing
jwt_auth_valid_token_responsefilter. - Add support for site with disabled permalink.
0.1.3
- Add
jwt_auth_do_custom_authfilter so that developer can use custom authentication like OTP authentication or any other.
0.1.2
- Working version.